SpecFlow is a great .NET testing framework for a BDD test-first approach. It uses plain and readable language to describe the behavior of the software, which both technical and non-technical staff can understand. This helps bring together the different project stakeholders, product owners, developers, and Quality Assurance (QA) engineers to collaborate and deliver high-quality software with a focus on communication, collaboration, and a good understanding of the business requirements.
SpecFlow ScenarioContext is a SpecFlow framework feature commonly used in behavior-driven development (BDD) for .NET applications. ScenarioContext allows the sharing of data between different steps in a SpecFlow scenario. It acts as a storage container for scenario-specific data, allowing information to be passed between different scenario steps.
In this Selenium C# tutorial, we will write an automated step using SpecFlow ScenarioContext to share data between steps.
Need a fake IP address for your testing projects? Use our free online Random IP Generator to quickly generate fake IP addresses with just a few clicks.
Why use SpecFlow?
In my experience, using SpecFlow for automation testing has helped the teams more easily integrate newbies into the test automation process, and providing test reports to higher-ups who do not need to know the code behind the tests is easier.
With SpecFlow, the executable specifications are written in Gherkin syntax, which follows basic English language rules and can be read by anybody regardless of technical background. This is very helpful when working in teams where some QA members are not yet very experienced in writing code or when other team members read the test results.
Another cool thing about the Given-When-Then test style, which I will cover in more detail, is that it can be used outside the test automation framework. For example, the tests can be saved in a separate test management tool if the project requires it.
These tests are easy to follow because they are written in plain English. Also, the manual tests — the tests that cannot or should not be automated — can be written following the same style. If a test fails, you can simply copy the SpecFlow scenario as it is in the bug report. The steps to reproduce should be clear enough for anyone.
Stop using the same password for everything! Create strong and unique passwords that are difficult to guess with our Random Password Generator. Try it now.
If you are new to SpecFlow, you can go through this guide on getting started with SpecFlow.
You can subscribe to the LambdaTest YouTube Channel for more tutorials on Selenium testing, Playwright testing, Cypress testing, and more.
What is SpecFlow ScenarioContext?
A common case when working with SpecFlow is shared data between the test steps or scenarios. To avoid code duplication, we can use the ScenarioContext class.
The ScenarioContext class is a shared context object used in SpecFlow to share data between different steps and scenarios. It allows storing and retrieving data throughout the execution of the test scenarios, and it can be used to transfer data between different steps and scenarios.
Starting with SpecFlow 3.0, ScenarioContext.Current has been marked as obsolete. Moving away from these properties is because they do not work when running scenarios in parallel. So, in versions 3.0 and higher, you must use the constructor to create an instance of ScenarioContext using Context-Injection.
ScenarioContext can be used in any SpecFlow hook that executes a scenario. So we can use ScenarioContext in [BeforeScenario, AfterScenario] and [BeforeStep, AfterStep], but it cannot be used in [BeforeTestRun, AfterTestRun] or [BeforeFeature, AfterFeature].
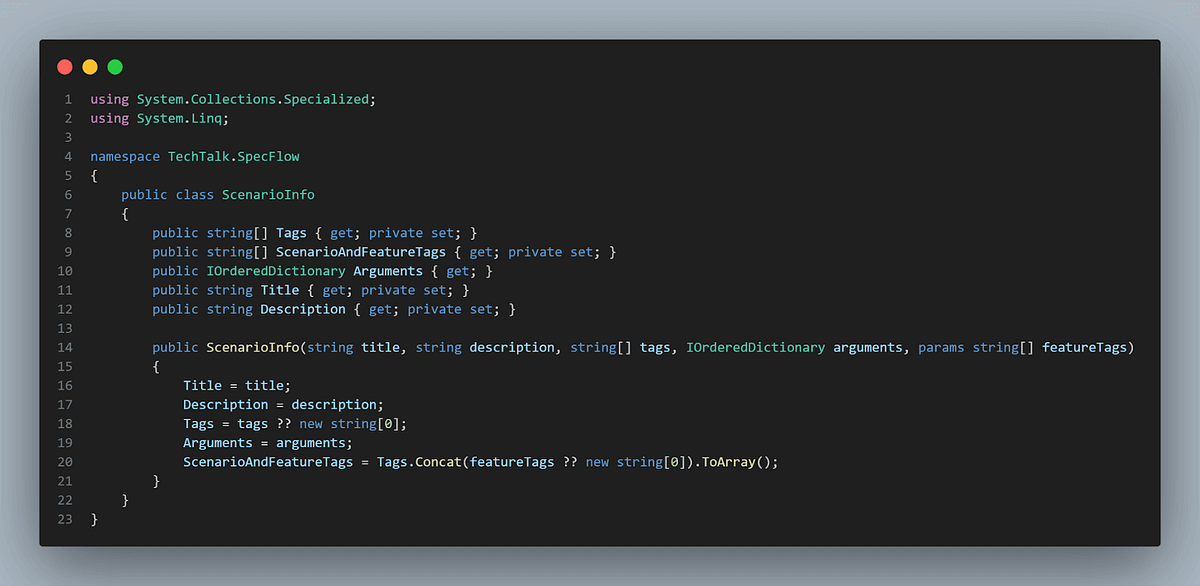
It can also provide other information about the scenario, such as tags, titles, and descriptions. This information is available through the ScenarioContext.ScenarioInfo class:
Need to generate random text based on a regular expression for testing and generating sample data.? Use our online tool to create random text from RegEx.
Using ScenarioContext in Selenium
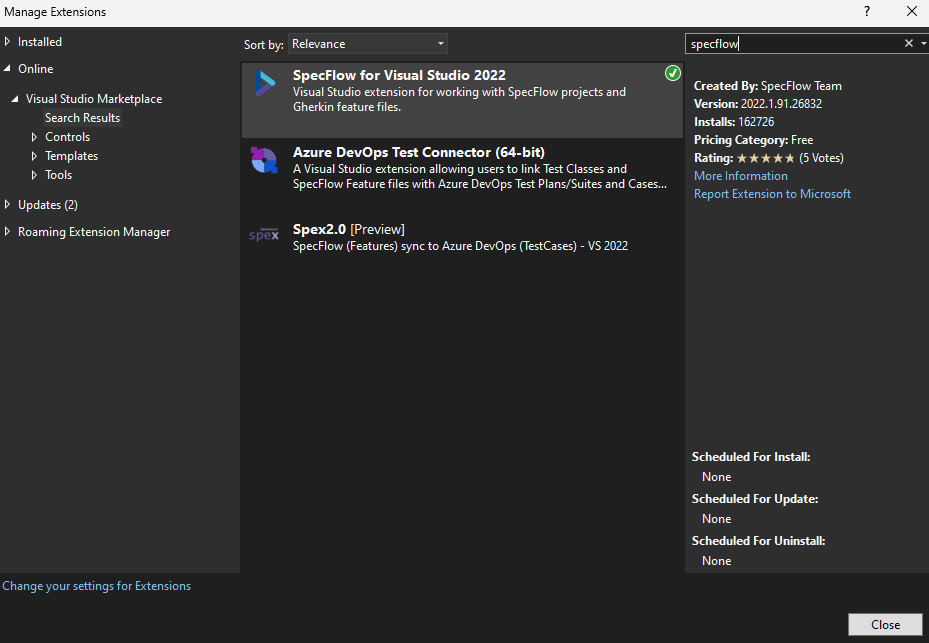
If you want to use SpecFlow, the best way is to work with Visual Studio. You will need to install SpecFlow as an extension. You can do this from the Extensions menu → Manage Extensions, and here search for the extension by name:
Once the installation is done, a new project template will be available when creating a new project:
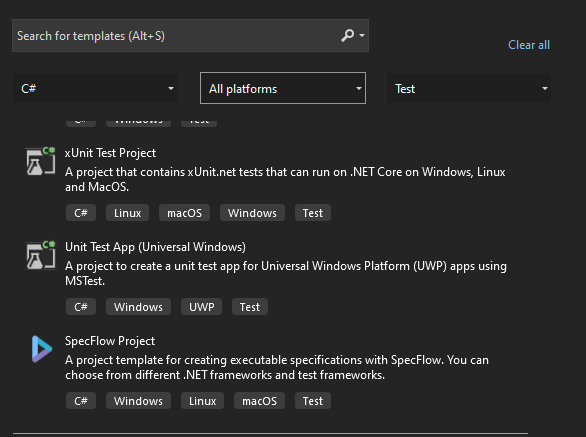
Once you complete the New Project steps, you will have a new SpecFlow project created in Visual Studio.
The SpecFlow project will contain a feature file, which is the type of file where the Gherkin scenarios are written, and a steps definition file — which is a C# class with the code for the steps:
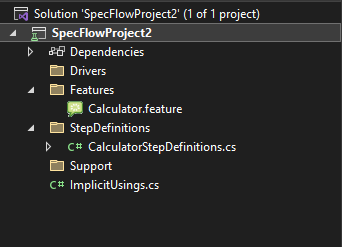
The feature file content looks like this:
Feature: Calculator

Simple calculator for adding **two** numbers
Link to a feature: [Calculator](SpecFlowProject2/Features/Calculator.feature)
***Further read***: **[Learn more about how to generate Living Documentation](https://docs.specflow.org/projects/specflow-livingdoc/en/latest/LivingDocGenerator/Generating-Documentation.html)**
@mytag
Scenario: Add two numbers
Given the first number is 50
And the second number is 70
When the two numbers are added
Then the result should be 120
We’re interested in the Scenario — this is the test case itself. The SpecFlow scenarios have a Given — When — Then Gherkin structure, equivalent to AAA — Arrange, Act, Assert. The And keyword can also be used to avoid repetitions of the same keyword.
This scenario is straightforward to read and understand, even if you don’t know C# or other programming languages.
Generate custom QR codes for your business or personal needs with our fast and easy-to-use QR code generator online tool in seconds. Try it now.
The implementation for a step looks like this:
[Given("the first number is (.*)")]
        public void GivenTheFirstNumberIs(int number)
        {
            throw new PendingStepException();
        }
Of course, in the provided example on project creation, no actual implementation for the steps is done, so the step will just throw a PendingStepException.
For this sample scenario, an implementation could look something like:
[Given("the first number is (.*)")]
        public void GivenTheFirstNumberIs(int number)
        {
            a = number;
        }
But we will look into this in more detail with a realistic web test scenario.
This Random ISBN Generator is a free easy-to-use tool to generate random and unique ISBN numbers. Generate the most accurate and verified ISBNs instantly.
Writing the First Gherkin Test
Now that we know the structure, we can write our tests using the same format. Let’s first understand some of the most important Gherkin keywords and what they mean:
Feature: provides a high-level description of a software feature and the scenarios included in a file. The file structure in Gherkin for Selenium Testing is defined by how different lines of code are indented in a feature file. Each line typically starts with a special keyword, and the statements are terminated by line endings known as steps. The first word in any feature file must be Feature, followed by a colon (:), followed by a description of the feature.
Scenario: is a business rule or the equivalent of a test case. The first line of a test must begin with Scenario:, followed by the test description.
Given: is the Arrange step — it is more like a precondition to the entire test.
When: is used for action steps.
Then: means the assertion of the test.
And: if we need multiple Given, When, or Then steps, we can use And to avoid repeating the same keyword.
Background: is used when the same Given step would be repeated in all the tests inside a feature file. This is a precondition that is repeated before each of the scenarios of the feature.
Scenario Outline: is used for data-driven scenarios or when we want to have the same scenario with different data sets.
Examples: the Examples keyword precedes the data table containing the test data for the Scenario Outline.
A Gherkin test for a Login page can look something like this:
Feature: As an existing user, I want to be able to log in, so that I can access my account.


Background: I access the login page


Scenario: Login with a valid account
    Given I enter a valid username and password
    When I press the Sign in button
    Then I can see My account page
Implementing the Test Steps
The test steps must be implemented in a C# class, marked with the Binding attribute. You can auto-generate the steps implementation by right-clicking inside the feature file and selecting Define Steps.
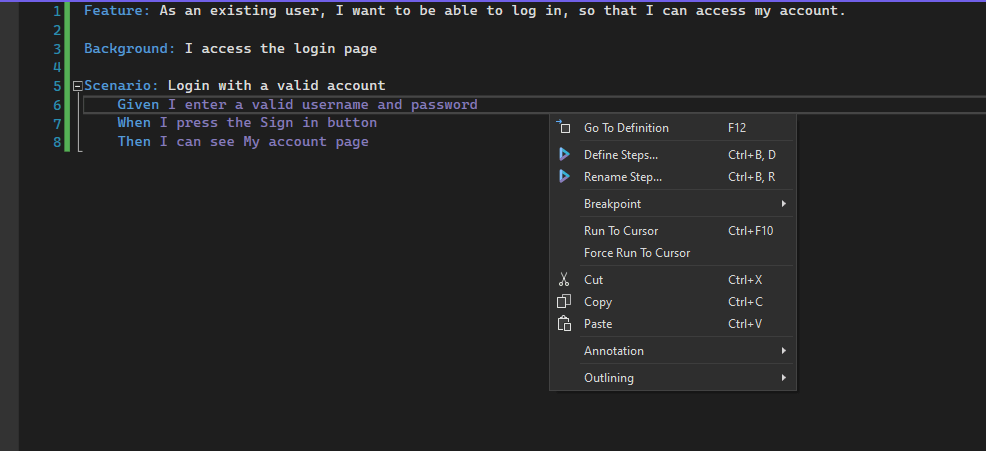
At first, they will have an implementation that only throws an error (as above). You can copy the steps definitions or add them to a class.
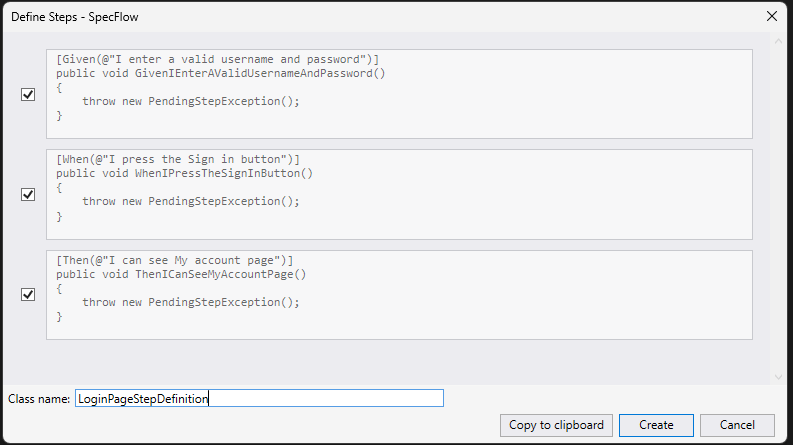
The way the steps are linked to their definition is through regular expressions. So, in the following example:
[Given(@"I enter a valid username and password")]
public void GivenIEnterAValidUsernameAndPassword()
{
        // step code here
}
The code between the curly brackets will be executed for each Given step that matches the regular expression between the quotes. In this case, it has to match the exact string, but it’s not mandatory.
Need a barcode for your products? Create high-quality custom barcodes using our online barcode generator. Try our barcode generator tool and get one in seconds.
Using SpecFlow ScenarioContext
As it happens so often, some of the test data we use will be shared between the test steps. For example, if you use a username and password in the first step of the previous example, you may want to check on the My Account page that the correct username is displayed after the login.
You can do this by passing a variable in each step or sharing that information using SpecFlow ScenarioContext.
The SpecFlow ScenarioContext can be used inside Bindings for specific SpecFlow hooks. So, for example, we can use ScnearioContext inside the Given, When, Then steps, or inside [BeforeScenario, AfterScenario] or [BeforeStep, AfterStep], but not in [BeforeTestRun, AfterTestRun] or [BeforeFeature, AfterFeature]. This is because no scenario is executed for the last hooks.
In line with the entity-based step organization rule, one efficient method for sharing data between different steps related to the same entity within the same scenario is to define instance fields in the binding classes. To use ScenarioContext, a new instance needs to be created inside the constructor of the Bindings class, as shown below:
public Bindings(ScenarioContext scenarioContext)
{
    _scenarioContext = scenarioContext;
}
Then, you can set and read its properties:
_scenarioContext["property"] = "value";
Demonstration: SpecFlow ScenarioContext
Let’s look at a scenario to better understand how to use SpecFlow ScenarioContext.
Scenario
Navigate to the LambdaTest eCommerce Playground page.
Expand the Shop by Category menu.
Select a category.
Validate that the correct category page is loaded.
Implementation
Feature: ECommerce


As a user, I want to navigate between the product categories
So I can find the desired product in the list


Background:
    Given I navigate to the LambdaTest ecommerce playground page


Scenario Outline: Navigate to categories
    Given I extend the Shop by Category menu
    When I select the <category> category
    Then the correct page is loaded
Examples:
    | category   |
    | Components |
    | Cameras    |
    | Software   |
using OpenQA.Selenium;
using OpenQA.Selenium.Remote;
using OpenQA.Selenium.Safari;


namespace SpecFlowScenarioContextDemo.StepDefinitions
{
    [Binding]
    internal class SetUp
    {
        protected static IWebDriver driver;
        public static string gridURL = "@hub.lambdatest.com/wd/hub";
        private static readonly string LT_USERNAME = Environment.GetEnvironmentVariable("LT_USERNAME");
        private static readonly string LT_ACCESS_KEY = Environment.GetEnvironmentVariable("LT_ACCESS_KEY");
        protected ScenarioContext scenarioContext;


        public SetUp(ScenarioContext _scenarioContext)
        {
            scenarioContext = _scenarioContext;
        }


        [BeforeScenario]
        internal static void RunSetup()
        {
            SafariOptions capabilities = new SafariOptions();
            capabilities.BrowserVersion = "latest";
            Dictionary<string, object> ltOptions = new Dictionary<string, object>();
            ltOptions.Add("username", LT_USERNAME);
            ltOptions.Add("accessKey", LT_ACCESS_KEY);
            ltOptions.Add("platformName", "macOS Ventura");
            ltOptions.Add("build", "SpecFlow ScenarioContext");
            ltOptions.Add("project", ScenarioContext.Current.ScenarioInfo.Title);
            ltOptions.Add("w3c", true);
            ltOptions.Add("plugin", "c#-nunit");
            capabilities.AddAdditionalOption("LT:Options", ltOptions);
            driver = new RemoteWebDriver(new Uri($"https://{LT_USERNAME}:{LT_ACCESS_KEY}{gridURL}"), capabilities);
        }


        [AfterScenario]
        internal void TearDown()
        {
            driver.Quit();
        }


    }
}
The above code showcases utilizing a cloud grid like LambdaTest to run the test.
Catch errors before they impact your JavaScript validator code. Our validator and linter enforces coding standards and helps you catch errors. Validate your code today.
LambdaTest is an AI-based test orchestration and execution platform that allows you to run SpecFlow tests with Selenium on a scalable and reliable cloud grid. With LambdaTest, you can conduct Selenium C# testing using SpecFlow on over 3000 unique combinations of browsers, operating systems, and devices.
The process is quite straightforward when running your tests on an online Selenium Grid, as the necessary code modifications are only related to the infrastructure.
After creating an account on LambdaTest, it is important to take note of your username and access key from the Profile Section. This combination will be used to access the remote Selenium Grid on LambdaTest.
The Dashboard provides a comprehensive view of all your text logs, screenshots, and video recordings for your SpecFlow Selenium C# tests. Furthermore, you can utilize the LambdaTest Capabilities Generator to generate the desired browser and platform capabilities for automation testing.
using NUnit.Framework;
using OpenQA.Selenium;
using OpenQA.Selenium.Support.UI;
using SeleniumExtras.WaitHelpers;


namespace SpecFlowScenarioContextDemo.StepDefinitions
{
    [Binding]
    internal class ECommerceStepDefinition : SetUp
    {
        public ECommerceStepDefinition(ScenarioContext _scenarioContext) : base(_scenarioContext)
        {
        }


        [Given(@"I navigate to the LambdaTest ecommerce playground page")]
        public void GivenINavigateToTheLambdaTestEcommercePlaygroundPage()
        {
            driver.Navigate().GoToUrl("https://ecommerce-playground.lambdatest.io/");
        }


        [Given(@"I extend the Shop by Category menu")]
        public void GivenIExtendTheShopByCategoryMenu()
        {
            driver.FindElement(By.XPath("//a[normalize-space()='Shop by Category']")).Click();
            WaitForElement($"//h5[normalize-space()='Top categories']");
        }


        [When(@"I select the (.*) category")]
        public void WhenISelectTheCategoryCategory(string categoryName)
        {
            scenarioContext["Category"] = categoryName;
            driver.FindElement(By.XPath($"//span[normalize-space()='{scenarioContext["Category"]}']")).Click();
        }


        [Then(@"the correct page is loaded")]
        public void ThenTheCorrectPageIsLoaded()
        {
            WaitForElement($"//h3[text()='Filter']");
            Assert.That(driver.Title == scenarioContext["Category"].ToString());
        }


        private static void WaitForElement(string xpath)
        {
            WebDriverWait wait = new WebDriverWait(driver, TimeSpan.FromSeconds(5));
            wait.Until(ExpectedConditions.ElementIsVisible(By.XPath(xpath)));
        }
    }
}

Code Walkthrough
eCommerce.feature (the feature file)
The feature file contains the test written in plain English, using the Gherkin keywords. The file starts with a short description of the feature. This is not mandatory, but since SpecFlow tests can also be used as documentation, including it is a good practice.
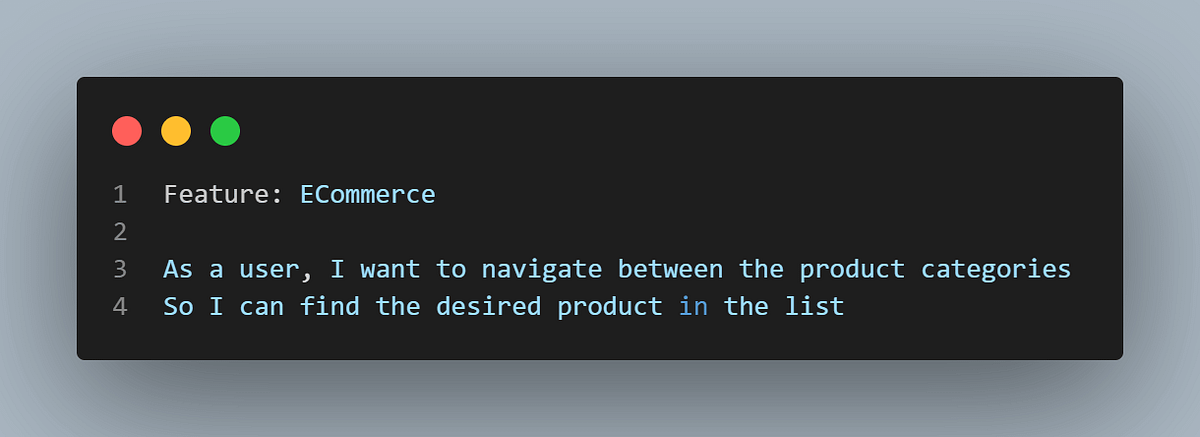
For this example, I ran the test 3 times for 3 categories. This means that we need to use Scenario Outline. They both start with the precondition that the page is loaded, defined in the Background.

Next comes the test scenario, or the ScenarioOutline, with 3 examples:
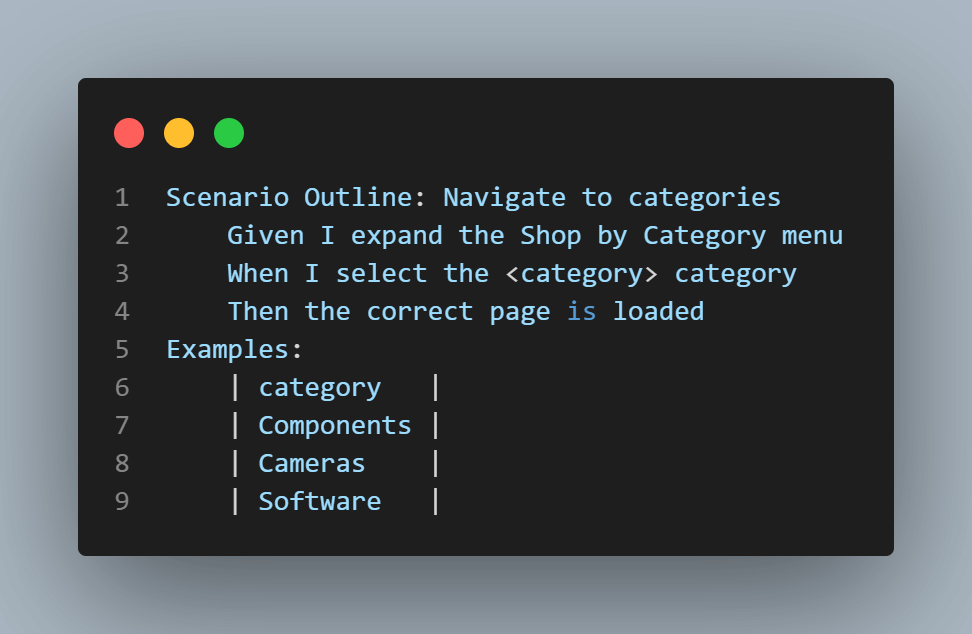
The <category> variable will receive a different value from the Examples table on each test run.
The beauty of using SpecFlow and Gherkin is that this scenario is easy to read and interpret as a regular test case. No programming language is needed to understand until this point, and we can show it to other members of our team who need to know what we are testing.
Test your native, hybrid, and web apps across all legacy and latest mobile operating systems on the most powerful Android emulator online.
SetUp.cs (the setup class)
This is where I have the BeforeScenario and AfterScenario methods, which must be executed before and after each scenario inside the solution.
The first part is the variable declaration:

I need to declare an IWebDriver variable, a variable of type ScenarioContext, and my LambdaTest credentials, which are stored on my machine as environment variables. I also have a constructor for the class:
 public SetUp(ScenarioContext _scenarioContext)
        {
            scenarioContext = _scenarioContext;
        }
In the BeforeScenario method, I have the code that needs to execute before the test steps:
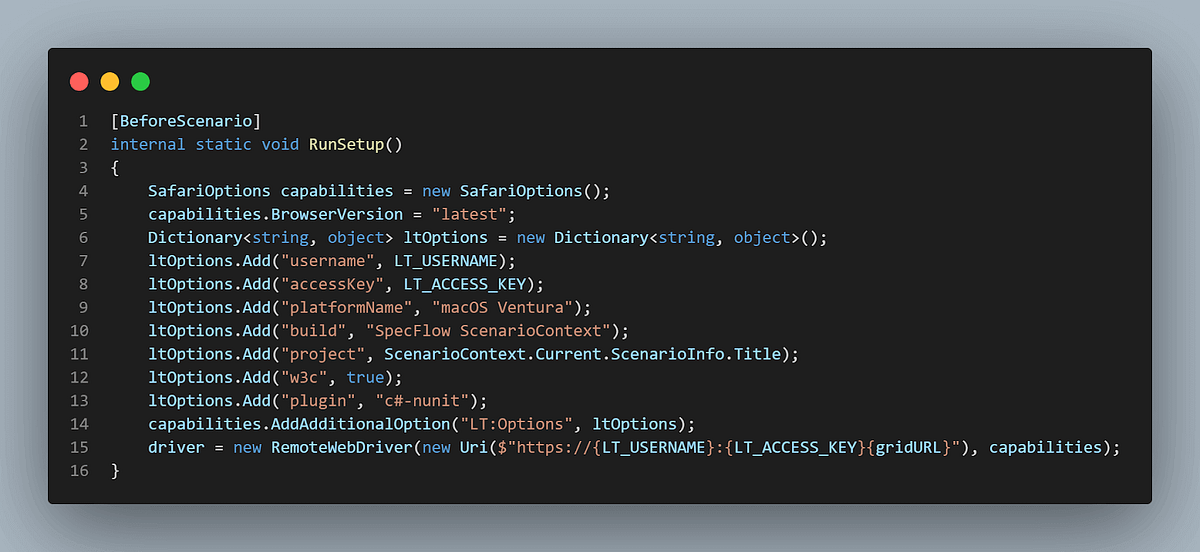
I will run the test on Safari browser, which is why I will set the capabilities I want to use in the test. You can easily obtain those using the Capabilities Generator. Then, create a new instance of the driver using those capabilities.
The AfterScenario methods will close all the browser instances:
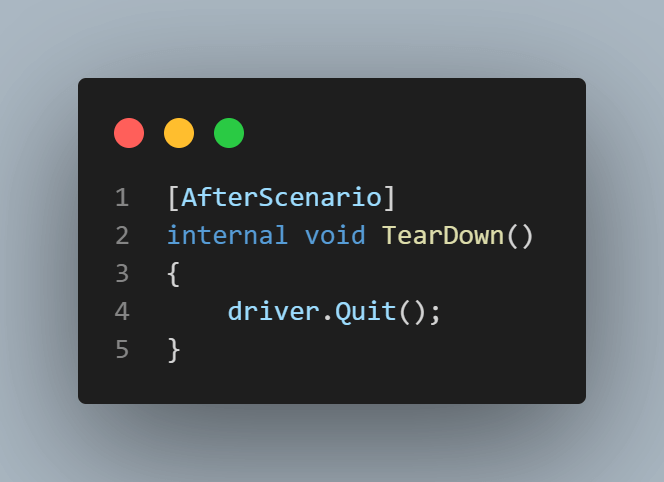
ECommerceStepDefinition.cs (the implementation class):
Here is where I have the implementations for the steps. The link between the class and the Gherkin steps is one through the [Bindings] attribute and the regular expressions that match the test steps.
Also, to have the before and after methods executed, this class needs to inherit the SetUp class:
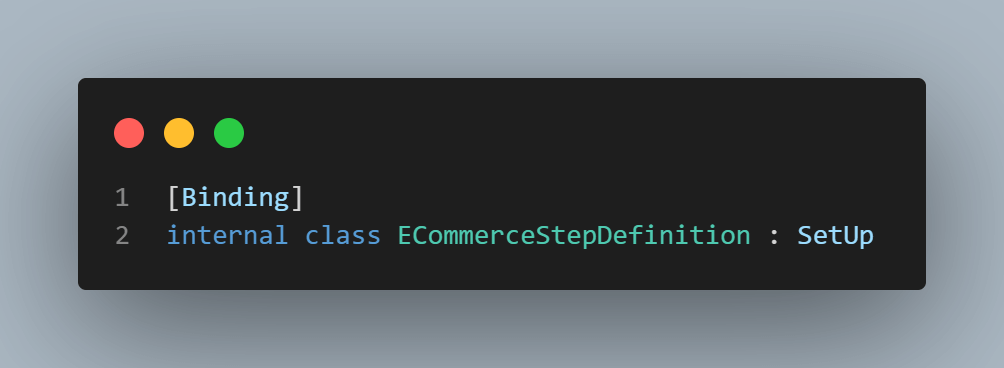
Then come the steps. They use attributes as the keywords in the Gherkin tests (Given, When, Then). Alternatively, you can use the StepDefinition attribute to match any previous keywords.
The first step is to navigate to the webpage under test using Navigate().GoTo() Selenium command:

Next comes the test step that expands the “Shop by category” menu. This is done by clicking on the element found by XPath, using its tag (a), and the text it contains (normalize-space()=’Shop by Category’). Then, I used a common method that waits for an element to be visible, using an explicit wait in Selenium.
In the next step, I am using a string variable to pass each category that needs to be selected. To do this in SpecFlow, you can use the regular expression for any string, “(.*)”. This means that the test matches if it contains anything between the “I select the “ string and the “ category” string.
In the first line of the method, I use the scenario context to store the category name and pass it to the next test step.
Then, using an XPath again, the test clicks the category link.

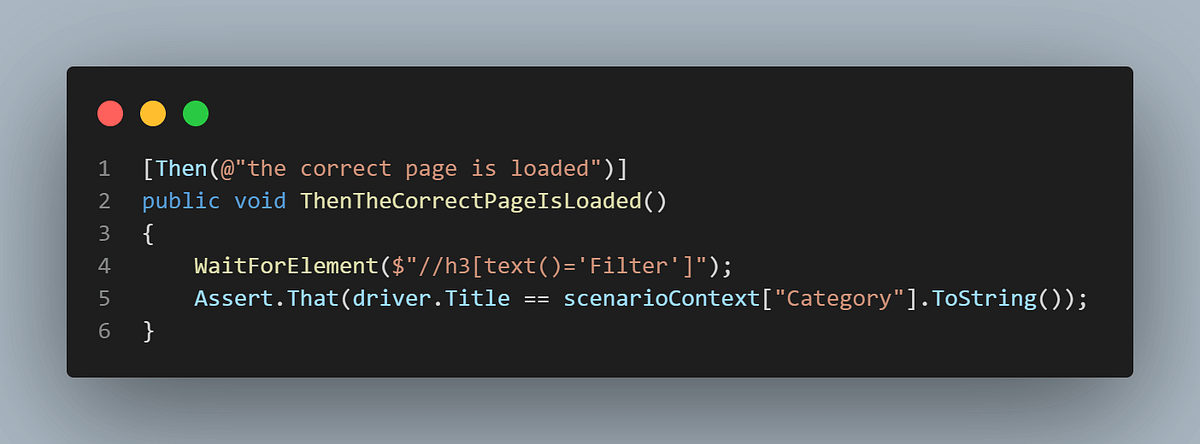
Finally, the last step checks that the page is correctly loaded by validating that the page title is the same as the previously selected category. I could have used a variable again, but using scenarioContex, I don’t need to.
To ensure the validation is done before the page is loaded, I am using the WaitForElement() method to wait for the Filter menu to be displayed. Then, I assert that the page’s title is the same as the previously set category.
In this tutorial, learn what is Regression testing, its importance, types, and how to perform it.
Test Execution
The tests are available in the Test Explorer tab. I am using tests plural because a test is available for each example:
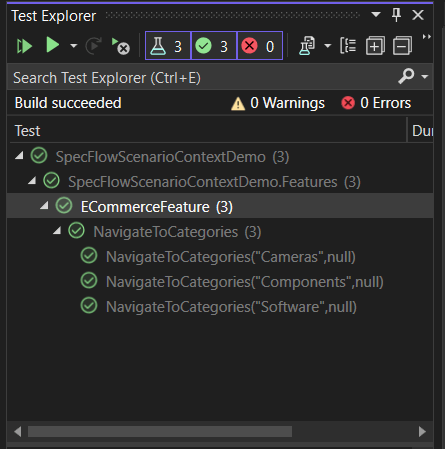
You can select one of them or one of the higher nodes (project name/feature name/scenario name) and press “Run all”.
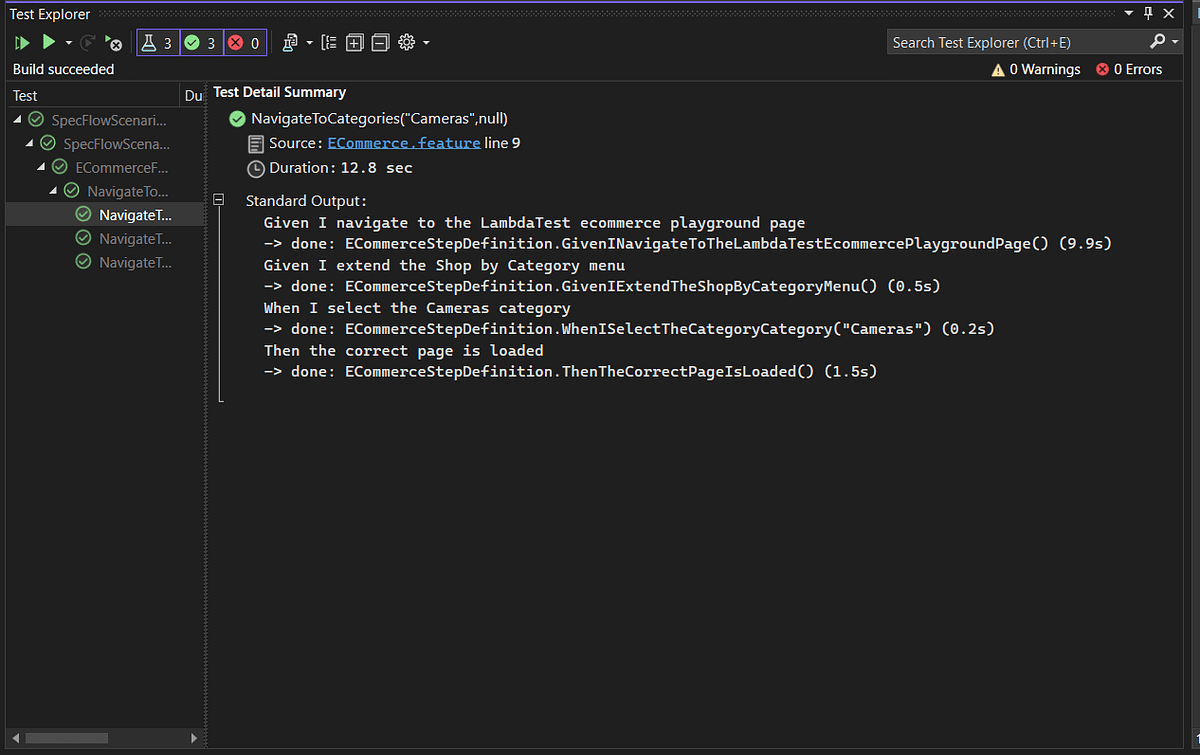
Because I am using my LambdaTest account, the tests will be executed on the Selenium Grid, but I can also see the results in Visual Studio (the green check mark means they are passed).
Each test execution is also displayed in the test details.
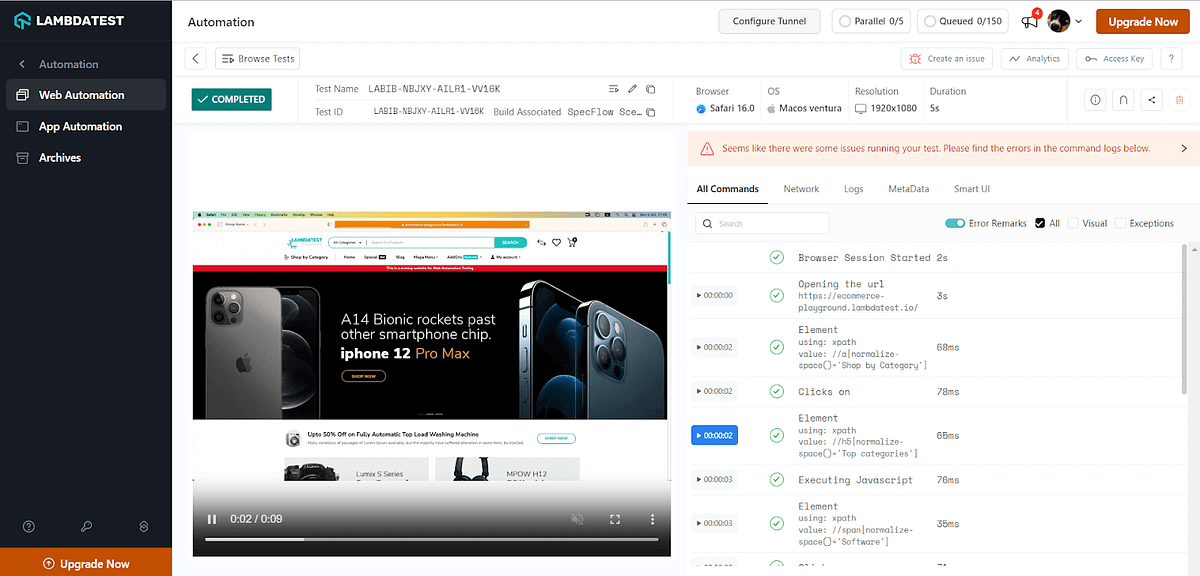
I can also see the test results (including a replay) on my Dashboard.
Perform browser automation testing on the most powerful cloud infrastructure. Leverage LambdaTest automation testing for faster, reliable and scalable experience on cloud.
Best Practices for SpecFlow ScenarioContext
While ScenarioContext in SpecFlow is a powerful feature that allows data to be shared between steps within a scenario, there are situations where its usage might not be ideal. Now, let’s consider some scenarios where using alternatives or avoiding ScenarioContext in SpecFlow might be more suitable.
Parallel Execution
If you design tests that run in parallel scenarios, using the SpecFlow ScenarioContext may lead to unexpected behavior. This is because the ScenarioContext is shared across steps within a scenario, and concurrent execution of scenarios can result in data interference. It is advisable to consider using thread-safe alternatives or scenarios that do not rely on shared context in parallel execution environments.
Global State Management
SpecFlow ScenarioContext offers a way to share the state between steps; however, heavily relying on global state management can negatively impact test maintainability. It is recommended instead to aim for scenarios and steps that are independent of each other while encapsulating their required data. This approach promotes better test isolation and makes identifying the cause of failures easier.
Data-Driven Testing
When it comes to testing scenarios that rely on data, managing the complexity of the SpecFlow ScenarioContext can be challenging. One approach to tackle this is utilizing external data sources like tables in feature or external data files. By incorporating these sources, you can drive your tests with various datasets, making your testing more robust and adaptable.
Long-Running Scenarios
In scenarios that are long-running or involve multiple steps, using SpecFlow ScenarioContext to pass data between steps can sometimes create confusion in the test logic. Instead, it is recommended to break down complex scenarios into smaller, focused ones. Each of these smaller scenarios can then independently manage their context.
Performance Testing
When it comes to performance or stress testing, where we simulate large sets of data or high concurrent user loads, using SpecFlow ScenarioContext can sometimes cause bottlenecks or contention issues. In these situations, assessing the performance impact and exploring other approaches is important.
External Dependency Management
When dealing with external dependencies or services, avoiding relying solely on a shared state through SpecFlow ScenarioContext is important. This approach can present challenges when unexpected failures or changes occur in the external systems. Instead, techniques such as mocking or stubbing, which provide greater control over external dependencies, are worth considering. By employing these methods, you can better manage and mitigate potential issues.
Overall, it’s important to remember that the appropriate use of SpecFlow ScenarioContext depends on your tests’ specific requirements and characteristics. While it can help share the state between steps in a scenario, it’s crucial to exercise caution and consider alternative approaches when necessary.
Get ready to showcase your mastery and extensive know-how in employing Selenium for C# automation testing by obtaining the coveted Selenium C# 101 certification. This valuable certification will bolster your technical proficiency and solidify your reputation as a skilled and reliable tester.
Which are the most wanted automation testing tools that have climbed the top of the ladder so far? Let’s take a look.
Conclusion
Working with SpecFlow can be a very good idea, especially if you need teams and people with various skills to collaborate on the project. The scenarios are easy to read, written in plain English, and use the Given-When-Then structure.
SpecFlow ScenarioContext comes in as a great asset. Its main strength is its capacity to provide smooth data exchange between various processes in a scenario, improving reusability and encouraging a clear division of responsibilities. With ScenarioContext, you can pass information and context easily throughout test scenarios, making it a great tool for maintaining state and sharing relevant data during complex test executions.
You can also leverage SpecFlow Actions and take your test automation to new heights. It empowers you to execute tests across various browser versions and operating systems.
