Scrolling up or down, and even horizontally, is quite common when navigating a web page. In test automation, this becomes important when you want to check that all the expected elements are displayed on the page. For example, the button to scroll back up works fine or interacts with elements that otherwise are not visible.
In version 4.2, Selenium introduced scroll wheel actions; however, these only work with the Chromium browser. To scroll down a page in Selenium C#, you will need to stick with the JavaScriptExecutor for other browsers or if you are using an older Selenium version.
In this blog, we will look at how to scroll down a page in Selenium WebDriver using C#.
What is JavaScriptExecutor in Selenium?
So, I mentioned JavaScriptExecutor, but what is it exactly? In short, it’s an interface to use with Selenium to interact with the web elements on a page using JavaScript code. This is because even Selenium has some limitations when it comes to web interactions, and JavaScript is a front-end programming language, which means it was designed specifically for the visible part of a web app.
Some of these actions include scrolling up and down a page, going back a certain number of pages, and interacting with elements. Selenium does this as well, but I’ll explain why JavaScript Executor is sometimes better later.
The syntax for JavaScriptExecutor in Selenium is shown below.
IJavaScriptExecutor js = (IJavaScriptExecutor) driver;
js.ExecuteScript("script to execute");
The IJavaScriptExecutor is the interface you need to cast on the driver object. Then, using the ExecuteScript method, pass the JavaScript script as a parameter. We’ll see it in action in upcoming sections of this blog on how to scroll down a page in Selenium WebDriver using C#.
How Can JavaScriptExecutor Help in Selenium Exceptions?
Not only can JavaScriptExecuter perform additional actions, but it can also help avoid potential exceptions without requiring extra steps. Some of these Selenium Exceptions are listed below.
NoSuchElementException
If your test throws a NoSuchElementException, ensure you’re using the correct locator for the element. You can check that simply by typing the locator in the search bar of the Elements tab in Developer Tools.
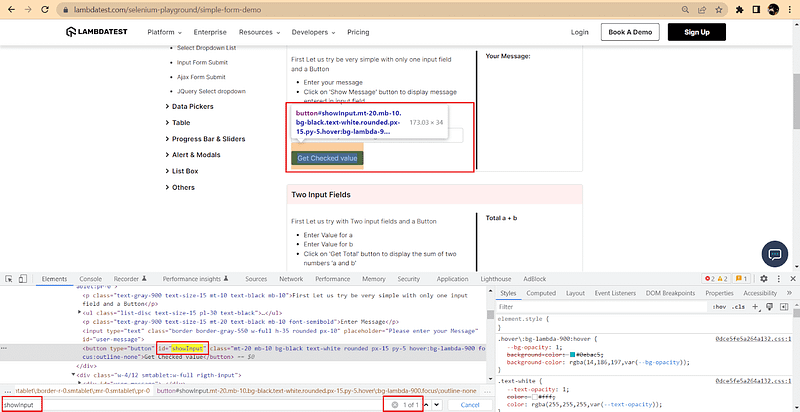
The Developer Tools will show how many elements were found and highlight the currently selected element in the HTML of the web page and on the page itself (see above my search for an ID on the page).
Once that’s out of the way, you can know that the element is loaded on the web page and the right locator is used. In this case, it’s safe to assume that the exception comes from the fact that the element is not visible because the page needs to be scrolled down.
The command for this is shown below.
js.ExecuteScript("window.scrollBy(0,250)", "");
This means that the page will be scrolled down by 250 pixels. You can use the same command to scroll up using a negative value.
js.ExecuteScript("window.scrollBy(0,-250)", "");
ElementClickInterceptedException
The ElementClickInterceptedException is thrown when the element is found on the page, but a different element overlaps our element, and the click would be performed on this incorrect element.
For example, when a prompt is loaded on a page with some action like “sign in” or “sign up” or when a menu is expanded on top of the element that interests you. To overcome this, you can use the click from the JavaScriptExecutor instead of the Selenium one:
js.ExecuteScript("arguments[0].click();", myElement);
Demonstration: How to Scroll Down A Page In Selenium WebDriver using C
Before we look at some examples of how to scroll down a page in Selenium WebDriver using C# to perform various types of scrolling, let’s set up a new test project. I’ll use the LambdaTest eCommerce Playground for the following scenarios — scrolling up, scrolling down, and scrolling to a specific element.
Download and install Visual Studio.
Create a new Visual Studio (or Visual Code) project.
Next, add Selenium.WebDriver NuGet package — you can do this by right-clicking on the solution name in Solution Explorer → Manage NuGet Packages.

In this Appium Automation tutorial, learn about Appium and its benefits for mobile automation testing. Take a look at how Appium works and see how to perform Appium testing of your mobile applications.
You can also add the package from the console, in the Tools → NuGet Package Manager → Package Manager Console, by running the following command. At the time of writing this blog on how to scroll down a page in Selenium WebDriver using C#, the latest version of Selenium.WebDriver NuGet package is 4.7.0, so I will be using this moving forward.
PM> NuGet\Install-Package Selenium.WebDriver -Version 4.7.0

Next, I’ll be using my LambdaTest platform to run my tests — this will help me run the tests on a different setup than what I have on my local machine or even run tests in parallel without using my machine’s resources.
LambdaTest is a continuous testing platform that lets you perform C# automation testing of websites and web applications across 3000+ real desktop and mobile browsers. You can automate your tests with frameworks like Selenium, Cypress, Playwright, and more. It further allows you to accelerate your test cycles by running automated C# tests in parallel.
%[INVALID_URL]Subscribe to the LambdaTest YouTube Channel to see our latest tutorials about Selenium testing, Cypress testing, Appium, and more.
I’ll be using the LambdaTest Automation Capabilities Generator to create this setup.
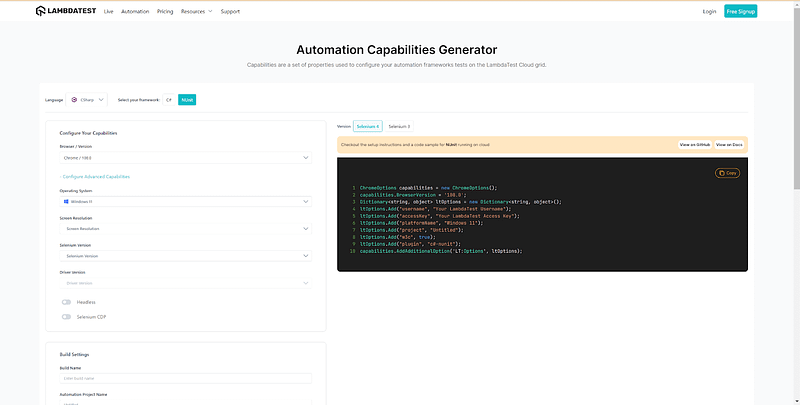
After generating the automation capabilities, I will copy it into my test class as shown below:
using OpenQA.Selenium;
using OpenQA.Selenium.Chrome;
using OpenQA.Selenium.Remote;


namespace ScrollAction_SeleniumWebDriver
{
    public class ECommerceTests
    {
        private static IWebDriver driver;
        private static readonly string gridURL = "@hub.lambdatest.com/wd/hub";
        private static readonly string LT_USERNAME = Environment.GetEnvironmentVariable("LT_USERNAME");
        private static readonly string LT_ACCESS_KEY = Environment.GetEnvironmentVariable("LT_ACCESS_KEY");
        private static readonly string testUrl = "https://ecommerce-playground.lambdatest.io/";


        [SetUp]
        public void Setup()
        {
            ChromeOptions capabilities = new ChromeOptions();
            capabilities.BrowserVersion = "108.0";
            Dictionary<string, object> ltOptions = new Dictionary<string, object>();
            ltOptions.Add("username", LT_USERNAME);
            ltOptions.Add("accessKey", LT_ACCESS_KEY);
            ltOptions.Add("platformName", "Windows 11");
            ltOptions.Add("project", "Selenium Scroll");
            ltOptions.Add("w3c", true);
            ltOptions.Add("plugin", "c#-nunit");
            capabilities.AddAdditionalOption("LT:Options", ltOptions);
            driver = new RemoteWebDriver(new Uri($"https://{LT_USERNAME}:{LT_ACCESS_KEY}{gridURL}"), capabilities);
        }
    }
}
Code Walkthrough
In this blog section of how to scroll down a page in Selenium WebDriver using C#, we will use the JavaScriptExecutor to scroll a page, let’s understand the above code.
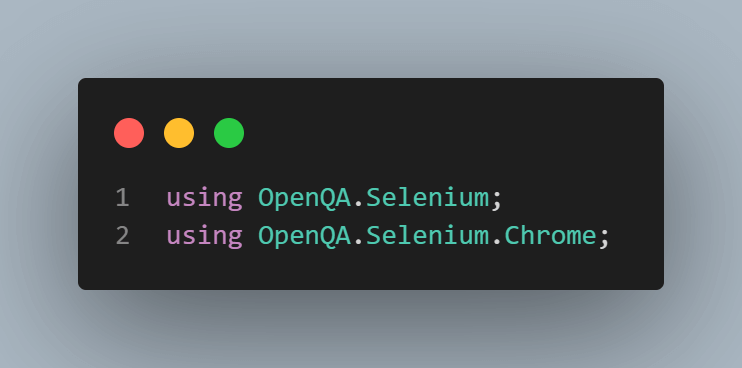
In the above test script, the class starts with using statements. These are used to instruct the code about the packages that will be used inside our class.
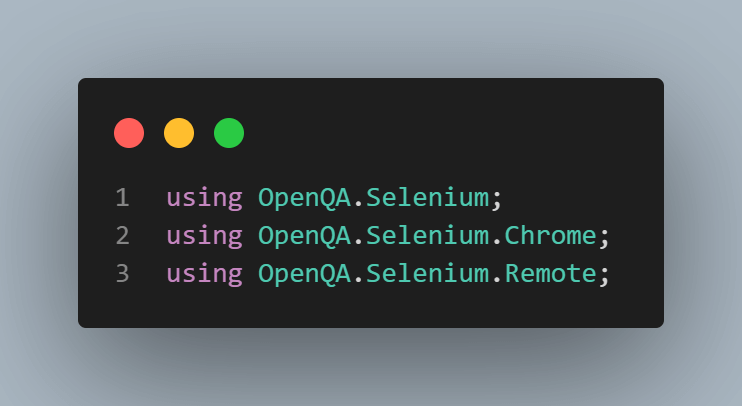
The only difference between these two using statements is that to run on the Selenium Grid with LambdaTest, you need to use the OpenQA.Selenium.Remote namespace.
Moving on, we have the variables we need to set up for our tests.

Again, if you run your tests locally, you don’t need to define the gridURL, LT_USERNAME, and LT_ACCESS_KEY. You only need the driver, which is the object that receives the requests from Selenium and sends them to the actual browser, and the testURL, a string that stores our website URL, so we don’t have to write it again every time.
If you test on the cloud grid, you also need the username and access key — I have them stored as environment variables because I find it safer, and if they change, I only need to change them in one place and not update all my projects that use them. The gridURL is a string I will be using a bit later.
Next comes the setup method: thanks to NUnit, using the SetUp annotation, the code knows that the method marked as SetUp needs to run before each test. We have a SetUp method whether we test on the grid:
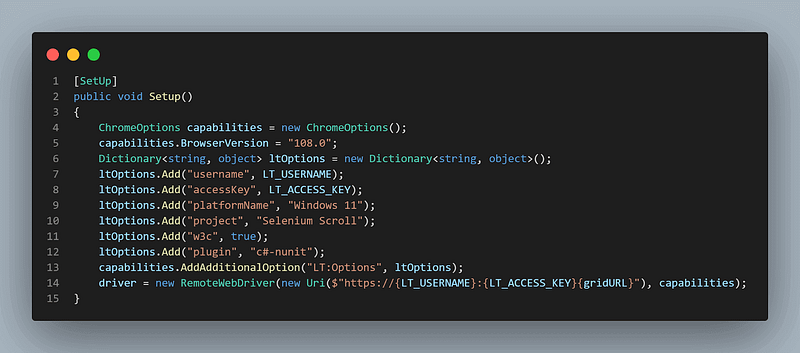
We will use all the capabilities defined above with the Capabilities Generator. Then the driver will be a new instance of the remote driver, using the URI created using the username, access key, and the gridURL variable we declared first.
How to Scroll to the Bottom of the Page in Selenium C#?
The first test I’ll write will scroll to the bottom of a web page. I’ll use the LambdaTest eCommerce Playground to do this. The idea is that to interact with the elements at the bottom of the page, I need to bring them into view.
As previously mentioned, we will need a JavaScriptExecutor to do this. The test class will look like this:
[Test]
public void ScrollToTheBottom()
{
    IJavaScriptExecutor js = (IJavaScriptExecutor)driver;
    driver.Navigate().GoToUrl(testUrl);
    js.ExecuteScript("window.scrollTo(0, document.body.scrollHeight)");
}
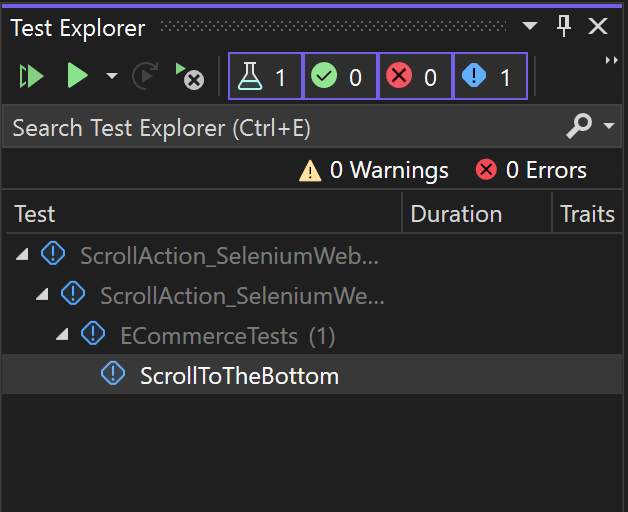
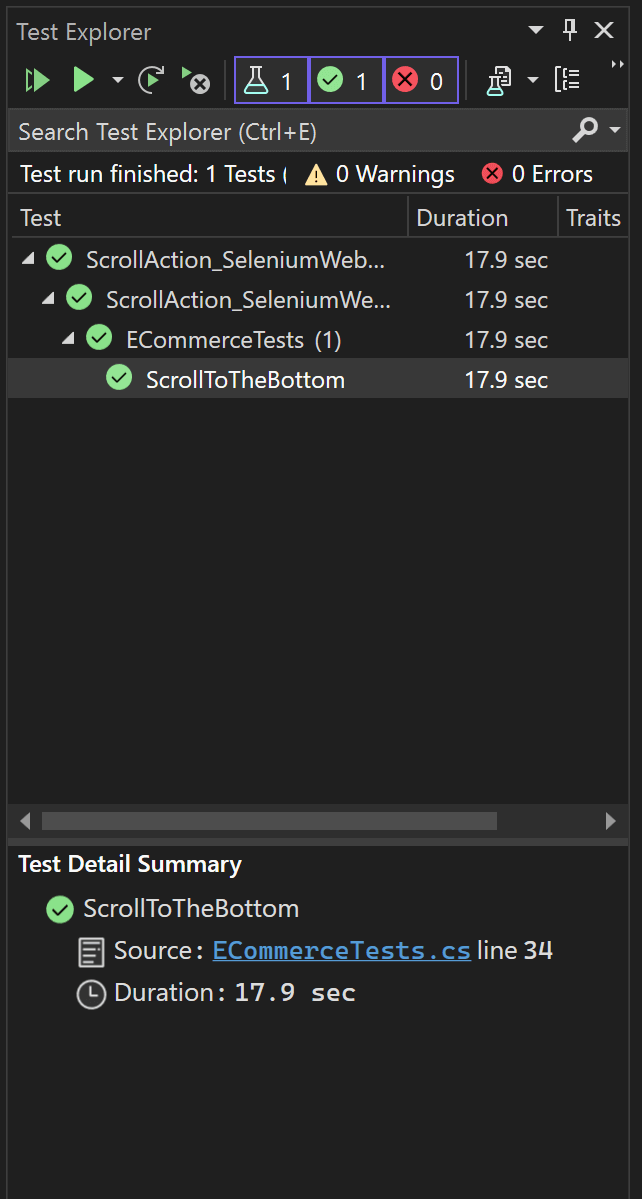
What happens here is that I used the NUnit [Test] annotation to mark my method as a test method — pretty straightforward here. This means that it will show up in my Test Explorer, and I can run it:
The first line inside the method is where I declare a new variable of the type IJavaScriptExecutor, which will cast upon the driver:

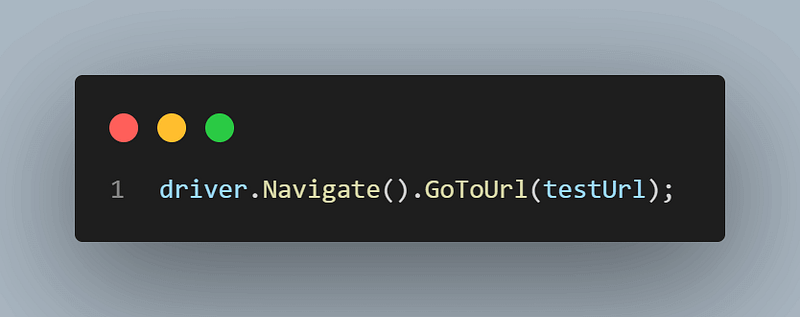
Next up comes opening the test site (the testUrl variable declared before) using the Navigate().GoToUrl() Selenium command:
And last but not least, we have the scrollTo command that performs the actual scroll.

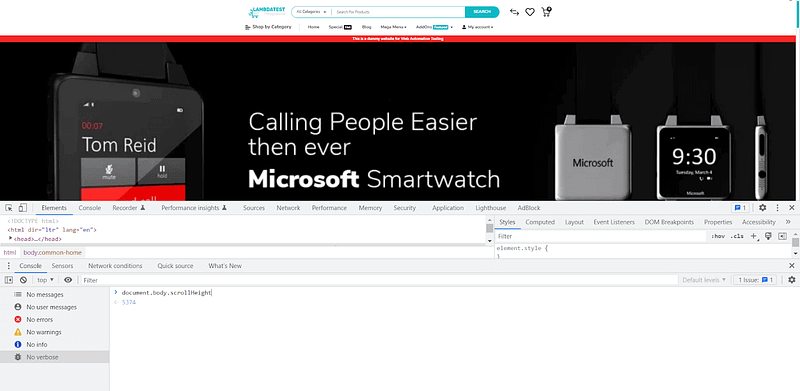
What happens here is the first parameter of the scroll represents the horizontal value. I don’t want to scroll horizontally, so I will leave it to 0. For the second parameter, I don’t know the exact length of the page, so I give it the document.body.scrollHeight value. This value represents the height of the loaded page.
You can see the scrollHeight in the browser using the Console of Developer Tools.
I’ll also add a TearDown method so the browser doesn’t stay open after the test completes
[TearDown]
public void TearDown()
{
    driver.Quit();
}
The TearDown Annotation in NUnit is a method to be run after each test. The single command I need is the one that closes all instances of the driver — Quit().
The result can be seen when running the test on the LambdaTest platform.
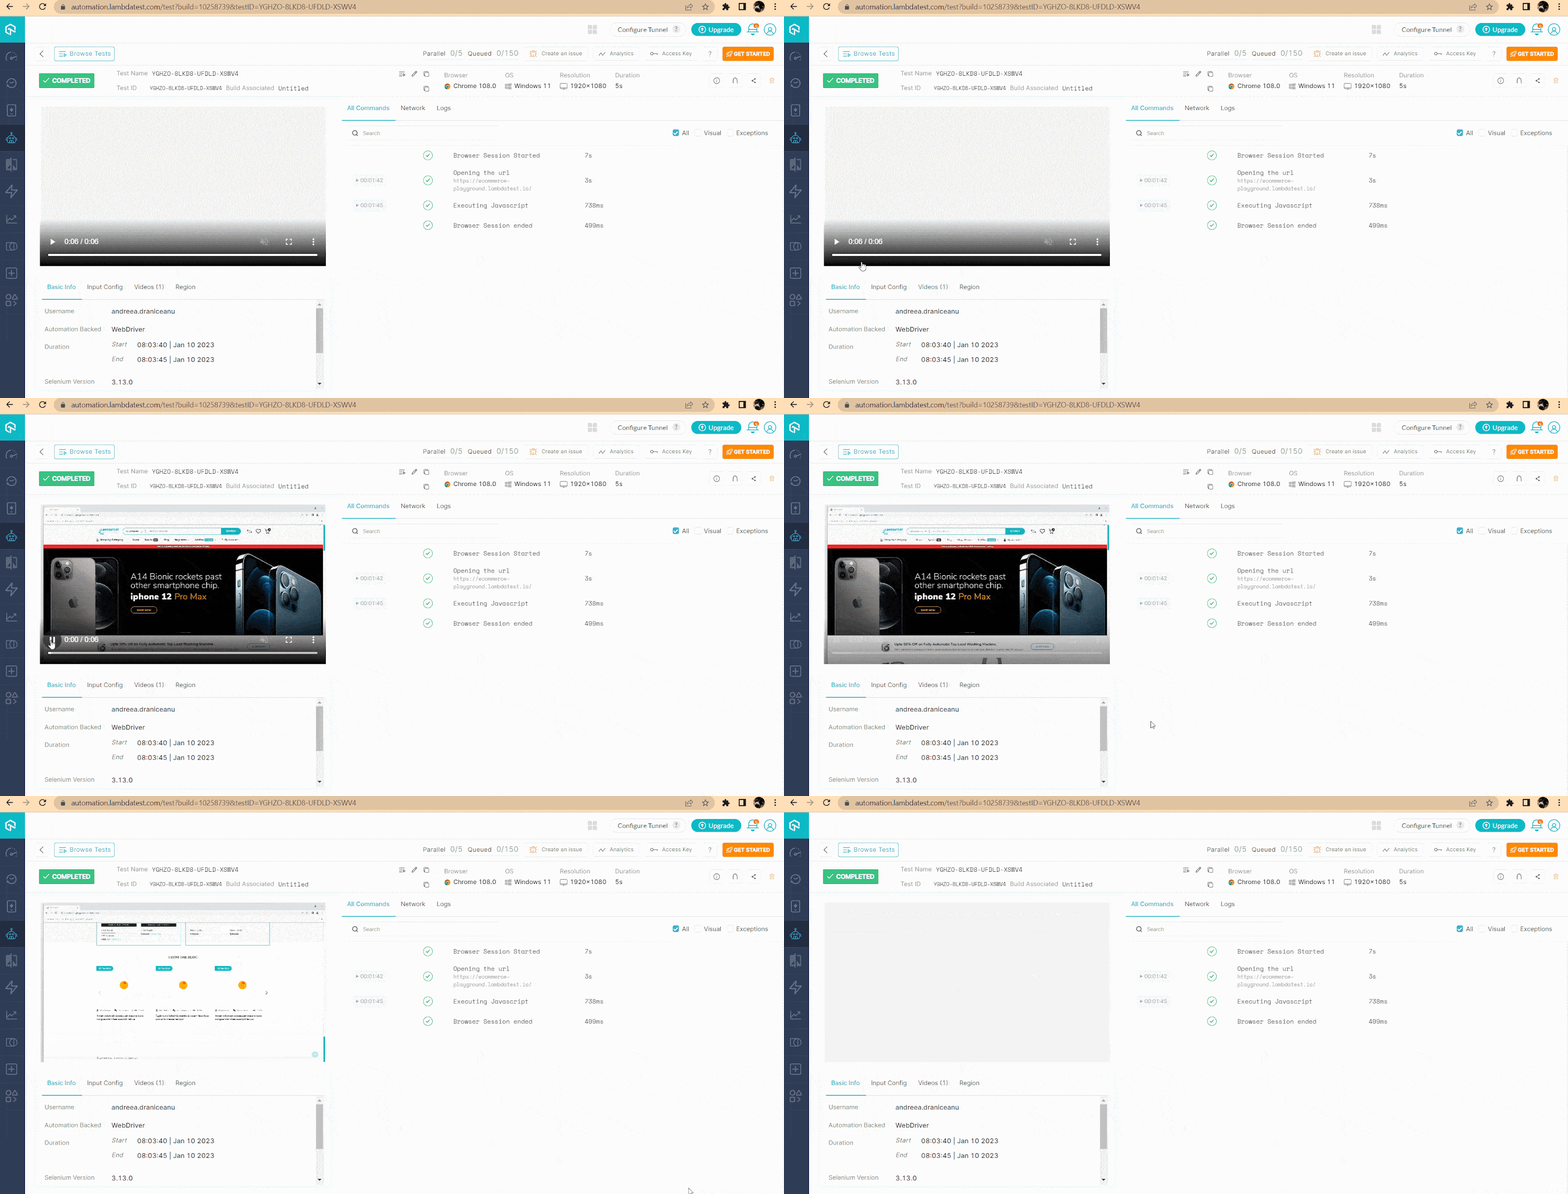
We can see here that all the test steps were executed and passed successfully.
In this Data driven testing tutorial, let us deep dive into what data driven testing is, its pros & cons, its types, data driven testing in an agile environment, benefits, and their best practices.
How to Scroll to the Top of the Page in Selenium C#?
By default, the page will load and scroll to the top, so simply executing a script that scrolls up will look like the test didn’t do anything.
In this blog section of how to scroll down a page in Selenium WebDriver using C#, I will modify my existing test to scroll back up after scrolling down, so both scrolls can be visible in the test execution.
[Test]
public void ScrollToTheBottomAndBackToTheTop()
{
    IJavaScriptExecutor js = (IJavaScriptExecutor)driver;
    driver.Navigate().GoToUrl(testUrl);
    js.ExecuteScript("window.scrollTo(0, document.body.scrollHeight)");
    js.ExecuteScript("window.scrollTo(0, -document.body.scrollHeight)");
}
The only new line of code is the last one. It looks the same as the one above, with the notable difference that it will use the same scroll amount but in the negative.
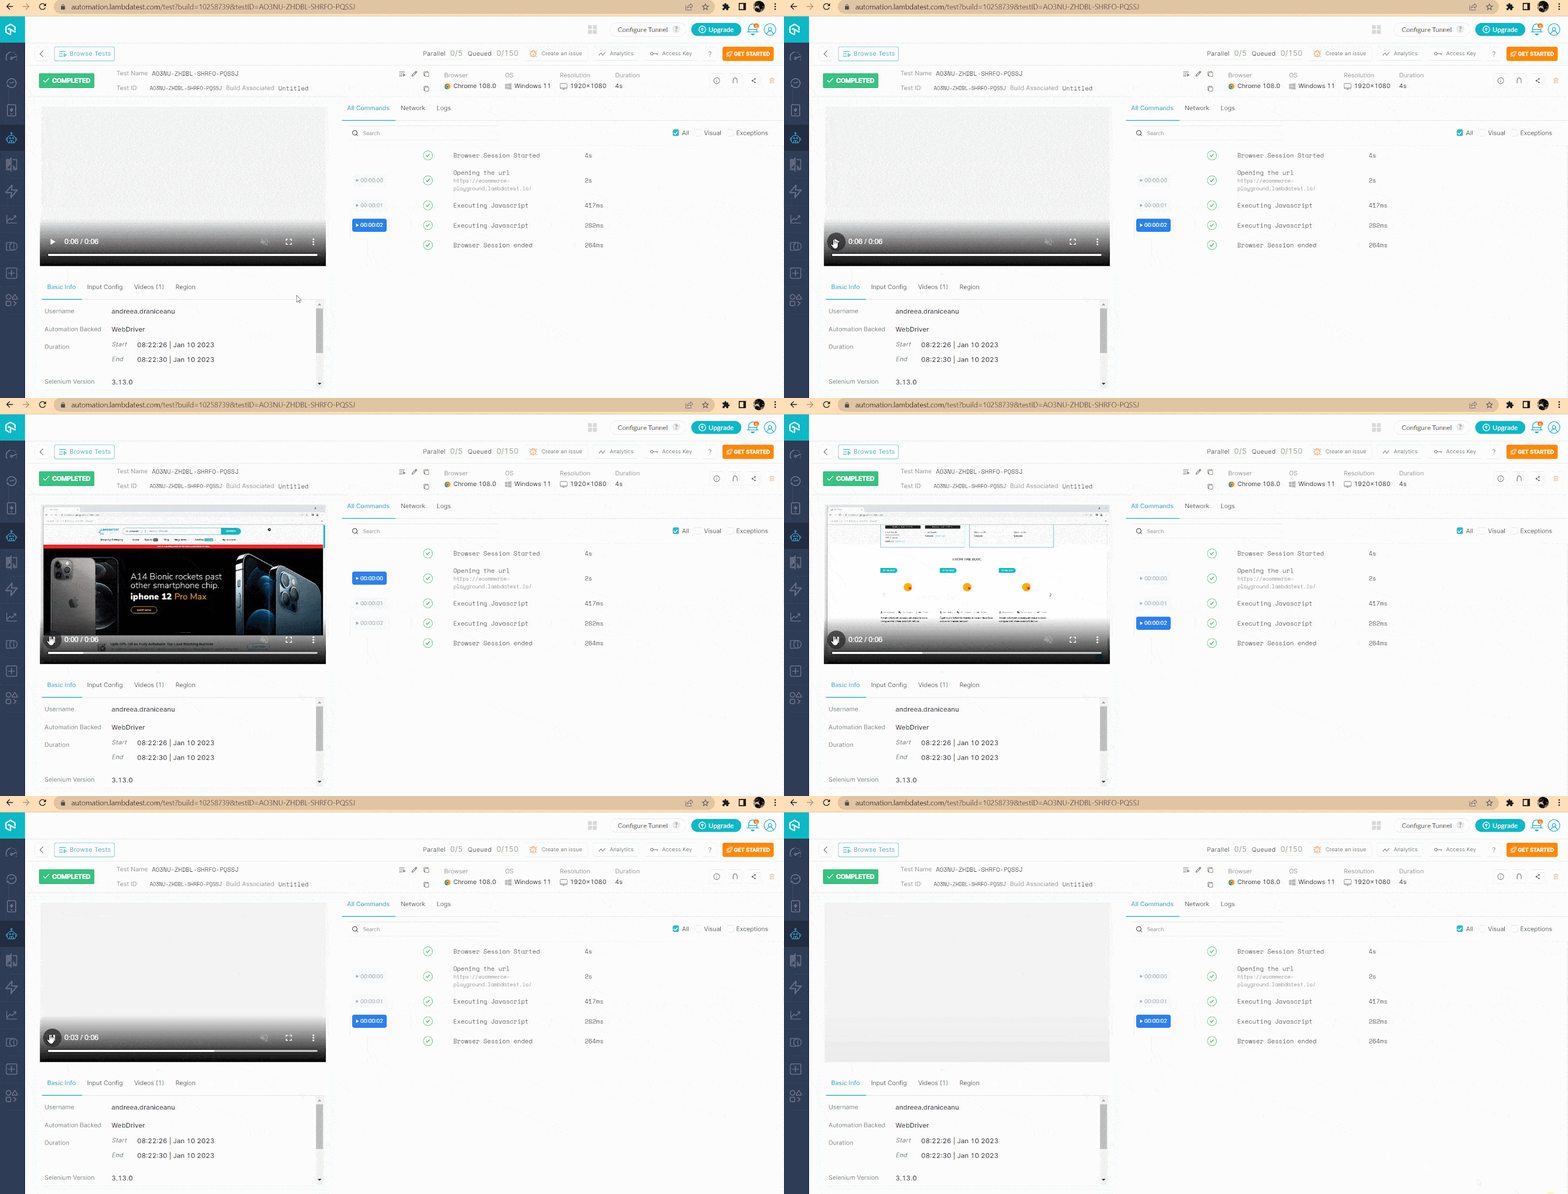
You can see the below video logs of the test execution that the page has scrolled down and then to the top.
How to Scroll Down a Page in Selenium WebDriver with C# by Given the Number of Pixels?
If you know the precise position where you want to scroll, you can execute a script that scrolls by that number of pixels. I’ll write a new test this time that opens the same web page and scrolls it down by 500 pixels:
[Test]
public void ScrollByAmount()
{
    IJavaScriptExecutor js = (IJavaScriptExecutor)driver;
    driver.Navigate().GoToUrl(testUrl);
    js.ExecuteScript("window.scrollBy(0,500)");
}
To scroll up, use the same command, but by a negative number of pixels:
js.ExecuteScript("window.scrollBy(0,-500)");
How to Scroll to an Element with Selenium C#?
The above scenario is probably not a very likely one. It will, however, be more common to want to scroll to a specific element on the page.
For this, you first want to identify the element on the page using the Selenium locators.
For this example, I want to scroll to the Shop Now button highlighted in the screenshot:
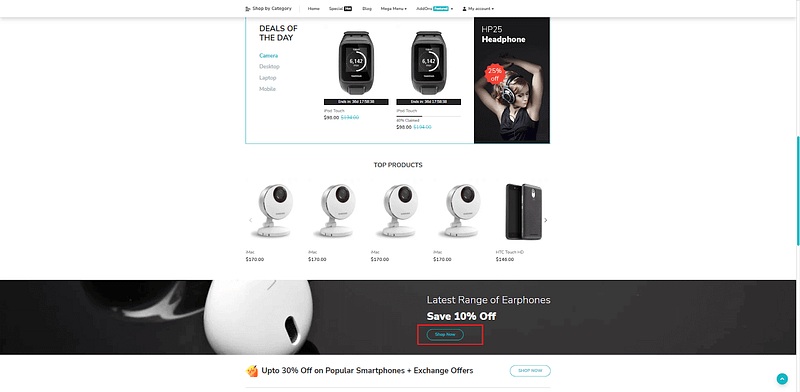
As you can see that the page is scrolled around the middle, the same things I want my test to perform. But I don’t want to give a specific number of pixels. Instead, I will specify the element I want to bring into view.
To identify the element, I will use XPath as a locator and the SelectorsHub Chrome extension to get it.
The steps are:
Right-click on the element and choose Inspect.
As shown below in the screenshot, copy the relative XPath from SelectorsHub and use it in the test.
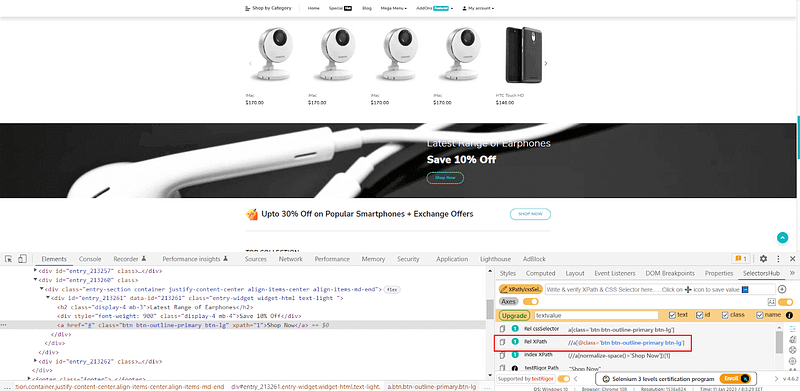
And here’s how the test looks like:
[Test]
public void ScrollToElement()
{
    IJavaScriptExecutor js = (IJavaScriptExecutor)driver;
    driver.Navigate().GoToUrl(testUrl);
    var button = driver.FindElement(By.XPath("//a[@class='btn btn-outline-primary btn-lg']"));
    js.ExecuteScript("arguments[0].scrollIntoView();", button);
}
In this test, we have a new variable for the element.

I am using the driver.FindElement command, with the chosen selector XPath, and using the XPath from before. For more information about the driver.FindElement command, check out this article on using the driver.FindElement And driver.FindElements In Selenium C#.
And the last line is the JavaScriptExecuteScript, where I tell my code to scroll to the element

How to Scroll Horizontally with Selenium C#?
In this blog section of how to scroll down a page in Selenium WebDriver using C#, we will learn how to scroll horizontally. To demonstrate this, I will use a different page, the LambdaTest Web Technologies Browser Compatibility, and I will resize the browser window to make sure that the horizontal scroll is visible:
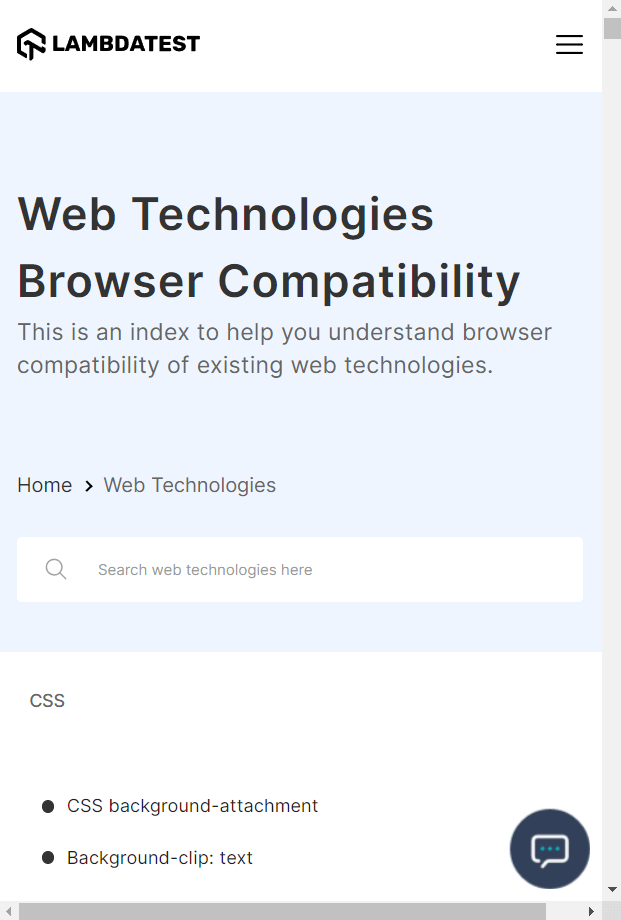
The code will look like this:
using OpenQA.Selenium;
using OpenQA.Selenium.Chrome;
using OpenQA.Selenium.Remote;
using System.Drawing;


namespace ScrollAction_SeleniumWebDriver
{
    public class ECommerceTests
    {
        private static IWebDriver driver;
        private static readonly string gridURL = "@hub.lambdatest.com/wd/hub";
        private static readonly string LT_USERNAME = Environment.GetEnvironmentVariable("LT_USERNAME");
        private static readonly string LT_ACCESS_KEY = Environment.GetEnvironmentVariable("LT_ACCESS_KEY");
        private static readonly string testUrl = "https://www.lambdatest.com/web-technologies";


        [SetUp]
        public void Setup()
        {
            ChromeOptions capabilities = new ChromeOptions();
            capabilities.BrowserVersion = "108.0";
            Dictionary<string, object> ltOptions = new Dictionary<string, object>();
            ltOptions.Add("username", LT_USERNAME);
            ltOptions.Add("accessKey", LT_ACCESS_KEY);
            ltOptions.Add("platformName", "Windows 11");
            ltOptions.Add("project", "Selenium Scroll");
            ltOptions.Add("w3c", true);
            ltOptions.Add("plugin", "c#-nunit");
            capabilities.AddAdditionalOption("LT:Options", ltOptions);
            driver = new RemoteWebDriver(new Uri($"https://{LT_USERNAME}:{LT_ACCESS_KEY}{gridURL}"), capabilities);
        }


        [Test]
        public void ScrollHorizontally()
        {
            IJavaScriptExecutor js = (IJavaScriptExecutor)driver;
            driver.Manage().Window.Size = new Size(200, 1500);
            driver.Navigate().GoToUrl(testUrl);
            js.ExecuteScript("window.scrollBy(50,0)");
        }
    }
}
What I have different now is the System.Drawing namespace, which allows me to give the new size to the window, the different testUrl, and the driver.Manage().Window.Size method.
<
driver.Manage().Window.Size = new Size(200, 1500);
The above line of command changes the driver window size to 200 by 1500 pixels. This allows the horizontal scroll to appear so I can run my test. The JavaScript command is the same as the one used for vertical scrolling by a given number of pixels, except this time, I gave a value to the first argument of the scrollBy() method, which signifies the horizontal amount, and 0 to the second argument, which is the vertical amount.
You can scroll vertically and horizontally simultaneously by giving both values in pixels:
js.ExecuteScript("window.scrollBy(50,100)");
Let’s see how that looks:

As you can see, the content of the page was moved as the scroll was performed.
To demonstrate your expertise as a tester the Selenium C# 101 certification from LambdaTest is a great way to demonstrate your proficiency as a tester. By earning this certificate, you can stand out from the crowd and highlight your C# automation skills.
In this XCUITest tutorial, learn about XCUITest framework and its benefits for mobile automation testing. Take a look at how XCUITest works and see how to use it to test your mobile applications.
Summing Up
With this, you now know how to scroll down a page in Selenium WebDriver using C#. In web automation with Selenium, we can sometimes find ourselves in situations where using just simple Selenium commands is not enough to achieve our goals. One of these situations is where the web page under test has a vertical or horizontal scroll or both, and scrolling needs to be done on the page.
While Selenium only provides scrolling capabilities limited to specific browsers, we can insert JavaScript commands in our Selenium tests to overcome these limitations. We can do this by using the IJavaScriptExecutor interface provided by Selenium, which sends JavaScript commands to the browser that allow us to scroll up, down, horizontally, or to a specific web element on the page.
